
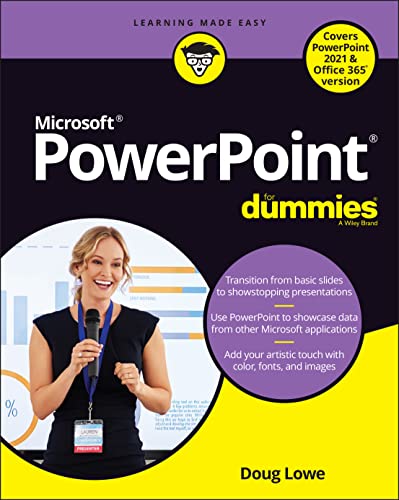
Powerpoint For Dummies, Office 2021 Edition / Doug Lowe.
Material type: TextPublisher: Indianapolis : John Wiley & Sons Inc., 2021Edition: 1stDescription: 384 pagesContent type:
 - text
- unmediated
- volume
- 9781119829140
- 005.58 LOW
| Cover image | Item type | Current library | Home library | Collection | Shelving location | Call number | Materials specified | Vol info | URL | Copy number | Status | Notes | Date due | Barcode | Item holds | Item hold queue priority | Course reserves | |
|---|---|---|---|---|---|---|---|---|---|---|---|---|---|---|---|---|---|---|
| Stack text books | All India Institute of Speech and Hearing | 2/5 | 005.58 LOW (Browse shelf(Opens below)) | Available | 23235 |
Introduction 1
About This Book 1
Foolish Assumptions 2
Icons Used in This Book 2
Beyond the Book 3
Where to Go from Here 3
Part 1: Getting Started with PowerPoint 5
Chapter 1: Welcome to PowerPoint 7
What in Sam Hill Is PowerPoint? 7
Getting PowerPoint 9
Introducing PowerPoint Presentations 10
Understanding Presentation Files 11
What's in a Slide? 12
Starting PowerPoint 14
Creating a Blank Presentation 14
Navigating the PowerPoint Interface 16
Unraveling the Ribbon 17
The View from Here Is Great 18
Editing Text 19
Adding a New Slide 20
Moving from Slide to Slide 22
Adding Some Style 22
Displaying Your Presentation 24
Saving Your Work 25
Closing a Presentation 25
Getting Help 26
Exiting PowerPoint 27
Chapter 2: Taking the Backstage Tour 29
Welcome to Backstage View 30
Considering Themes and Templates 31
Saving Your Presentation 35
Saving to a location on your computer 36
Saving to OneDrive 37
Saving a copy of a presentation 38
Opening a Presentation 39
Pinning a Presentation for Easy Access 40
Chapter 3: Editing Slides 43
Moving from Slide to Slide 44
Working with Objects 44
Selecting objects 45
Resizing or moving an object 46
Editing a Text Object 48
Selecting Text 49
Using Cut, Copy, and Paste 50
Duplicating an Object 52
Using the Clipboard Task Pane 52
Oops! I Didn't Mean It (The Marvelous Undo Command) 53
Working with Slide Layouts 54
Deleting a Slide 56
Duplicating a Slide 56
Finding Text 56
Replacing Text 58
Rearranging Your Slides in Slide Sorter View 59
Chapter 4: Working in Outline View 63
Calling Up the Outline 63
Selecting and Editing an Entire Slide 65
Selecting and Editing One Paragraph 65
Promoting and Demoting Paragraphs 65
Adding a New Paragraph 66
Adding a New Slide 67
Moving Text Up and Down 68
Collapsing and Expanding the Outline 68
Chapter 5: Proofing Your Presentations 69
Checking Spelling as You Go 70
Spell Checking After the Fact 71
Using the Thesaurus 74
Capitalizing Correctly 75
Using the AutoCorrect Feature 76
Chapter 6: Don't Forget Your Notes! 79
Understanding Notes 80
Adding Notes to a Slide 81
Adding an Extra Notes Page for a Slide 82
Adding a New Slide from Notes Page View 83
Printing Notes Pages 83
Displaying Notes on a Separate Monitor 84
Chapter 7: Show Time! 85
The Quick Way to Print 86
Printing from Backstage View 86
Printing more than one copy 87
Changing printers 87
Printing part of a document 88
Using Print Preview 89
Setting Up a Slideshow 89
Starting a Slideshow 90
Working in Presenter View 91
Controlling Your Presentation with the Keyboard and Mouse 93
Using Presentation Tools 94
Using the Laser Pointer feature 95
Scribbling on your slides 96
Rehearsing Your Slide Timings 97
Using Custom Shows 98
Creating a custom show 99
Showing a custom show 100
Hiding slides 100
Showing Your Presentation Online 100
Part 2: Creating Great-Looking Slides 103
Chapter 8: All about Fonts and Text Formatting 105
Changing the Look of Your Text 106
Changing the size of characters 108
Choosing text fonts 109
Adding color to your text 109
Adding shadows 110
Big Picture Text Formatting 110
Biting the bulleted list 111
Creating numbered lists 112
Setting tabs and indents 114
Spacing out 115
Lining things up 115
Making columns 117
Creating Fancy Text with WordArt 117
Chapter 9: Designing Your Slides 121
Looking at the Design Tab 121
Working with Themes 122
Applying themes 123
Using theme colors 124
Using theme fonts 128
Applying theme effects 128
Changing the Slide Size 129
Applying Background Styles 130
Using a gradient fill 131
Using other background effects 133
Using the Design Ideas Feature to Design Your Slides 134
Chapter 10: Animating Your Slides 135
Using the Transitions Tab 135
Creating a slide transition 136
Using the Morph transition effect 139
Using the Animations Tab 140
Using advanced animations 142
Timing your animations 150
Chapter 11: The Art of Inking Your Slides 155
Drawing on Your Slides 156
Using the Ruler 158
Converting Windows Ink to Text 160
Converting Windows Ink to Shapes 161
Converting Windows Ink to a Math Formula 162
Animating Windows Ink 163
Chapter 12: Masters of the Universe Meet the Templates of Doom 165
Working with Masters 166
Modifying the slide master 167
Modifying the handout master 172
Modifying the notes master 173
Using Masters 174
Overriding the master text style 174
Hiding background objects 174
Using Headers and Footers 175
Adding a date, number, or footer to slides 176
Adding a header or footer to notes or handouts pages 177
Editing the header and footer placeholders directly 178
Yes, You Can Serve Two Masters 178
Creating a new slide master 178
Applying masters 180
Preserving your masters 181
Restoring Lost Placeholders 181
Working with Templates 182
Creating a new template 183
Creating a presentation based on a template 183
Working with Presentation Sections 184
Part 3: Embellishing Your Slides 187
Chapter 13: Inserting Pictures 189
Exploring the Many Types of Pictures 190
Bitmap pictures 190
Victor, give me a vector 191
Inserting Pictures in Your Presentation 192
From the web 192
From your computer 194
From the stock library 196
Moving, Sizing, Stretching, and Cropping Pictures 197
Adding Style to Your Pictures 199
Applying a picture border 200
Applying picture effects 200
Applying Artistic Effects 201
Removing picture backgrounds 202
Correcting Sharpness, Brightness, Contrast, and Color 205
Compressing Your Pictures 206
Working with 3D Models 208
Chapter 14: Drawing on Your Slides 211
Some General Drawing Tips 211
Zooming in 211
Displaying the ruler, gridlines, and guides 212
Sticking to the color scheme 213
Saving frequently 213
Remembering Ctrl+Z 213
Drawing Simple Objects 214
Drawing straight lines 215
Drawing rectangles, squares, ovals, and circles 216
Creating Other Shapes 216
Drawing a shape 217
Drawing a polygon or free-form shape 219
Drawing a curved line or shape 220
Creating a text box 221
Styling Your Shapes 222
Setting the shape fill 222
Setting the shape outline 222
Applying shape effects 223
Flipping and Rotating Objects 224
Flipping an object 224
Rotating an object 90 degrees 224
Using the rotate handle 225
Drawing a Complicated Picture 225
Changing layers 226
Line 'em up 227
Using the grids and guides 227
Group therapy 228
Chapter 15: Charting for Fun and Profit 231
Understanding Charts 232
Adding a Chart to Your Presentation 233
Adding a new slide with a chart 233
Adding a chart to an existing slide 237
Pasting a chart from Excel 238
Changing the Chart Type 238
Working with Chart Data 239
Switching rows and columns 240
Changing the data selection 241
Editing the source data 242
Refreshing a chart 242
Changing the Chart Layout 242
Changing the Chart Style 243
Embellishing Your Chart 245
Using Treemap and Sunburst Charts 247
Using Map Charts 249
Chapter 16: Working with SmartArt 253
Understanding SmartArt 253
Creating a SmartArt Diagram 255
Tweaking a SmartArt Diagram 258
Editing the SmartArt Text 259
Working with Organization Charts 261
Adding boxes to a chart 262
Deleting chart boxes 262
Changing the chart layout 263
Chapter 17: Lights! Camera! Action! (Adding Sound and Video) 265
Adding Sound to a Slide 266
Investigating sound files 266
Inserting an audio sound object 267
Setting audio options 269
Adding Video to Your Slides 271
Finding a video to add to your presentation 271
Inserting a video clip 272
Setting video options 273
Compressing Media 277
Chapter 18: More Things to Insert on Your Slides 279
Inserting Tables 279
Creating a table in a Content placeholder 280
Inserting a table on a slide 281
Drawing a table 281
Adding style to a table 283
Working with the Layout tab 285
Inserting WordArt 288
Using Hyperlinks 289
Creating a hyperlink to another slide 291
Creating a hyperlink to another presentation or to a website 292
Adding Action Buttons 293
Assigning button actions 294
Choosing button shapes 294
Creating a button 294
Creating a navigation toolbar 297
Inserting Equations 298
Inserting Icons 302
Part 4: Working with Others 305
Chapter 19: Collaborating on Presentations 307
Understanding Collaboration 307
Working with OneDrive 309
Managing OneDrive features 312
Sharing a OneDrive presentation 314
Working with Teams 319
Collaborating in Real Time 324
Using Comments 325
Chapter 20: Stealing Slides from Other Presentations 327
Misdemeanor Slide Theft 328
Building a Slide Repository 330
Chapter 21: Exporting Your Presentation to Other Formats 333
Creating a PDF File 334
Crafting a Video 335
Adding timings and narration 336
Creating a video 338
Creating an Animated GIF 340
Packaging Your Presentation on a CD 343
Creating Handouts in Microsoft Word 345
Publishing a Presentation to Microsoft Stream 347
Part 5: The Part of Tens 351
Chapter 22: Ten PowerPoint Commandments 353
I Thou Shalt Frequently Savest Thy Work 353
II Thou Shalt Storeth Each Presentation in Its Proper Folder 354
III Thou Shalt Not Abuseth Thy Program's Formatting Features 354
IV Thou Shalt Not Stealeth Copyrighted Materials 354
V Thou Shalt Abideth by Thine Color Scheme, Auto-Layout, and Template 355
VI Thou Shalt Not Abuse Thine Audience with an Endless Array of Cute Animations or Funny Sounds 355
VII Keep Thy Computer Gurus Happy 355
VIII Thou Shalt Backeth Up Thy Files Day by Day 355
IX Thou Shalt Fear No Evil, for Ctrl+Z Is Always with Thee 356
X Thou Shalt Not Panic 356
Chapter 23: Ten Tips for Creating Readable Slides 357
Try Reading the Slide from the Back of the Room 357
Avoid Small Text 358
No More Than Five Bullets, Please 358
Avoid Excessive Verbiage Lending to Excessively Lengthy Text
That Is Not Only Redundant But Also Repetitive and Reiterative 358
Use Consistent Wording 358
Avoid Unsightly Color Combinations 359
Watch the Line Endings 359
Keep the Background Simple 360
Use Only Two Levels of Bullets 360
Avoid Bullets Altogether If You Can 360
Keep Charts and Diagrams Simple 361
Chapter 24: Ten Ways to Keep Your Audience Awake 363
Don't Forget Your Purpose 363
Don't Become a Slave to Your Slides 364
Don't Overwhelm Your Audience with Unnecessary Detail 364
Don't Neglect Your Opening 364
Be Relevant 365
Don't Forget the Call to Action 365
Practice, Practice, Practice 365
Relax! 366
Expect the Unexpected 366
Don't Be Boring 366
Index 367
Part 4: Working with Others 305
There are no comments on this title.